Applying gel nail polish correctly involves precise steps: preparation, base coat, color, and top coat, all cured under a UV/LED lamp. This meticulous process ensures a durable and salon-quality finish, preventing common issues like chipping or lifting.
Many common mistakes in gel polish application, such as improper nail preparation or inadequate curing, lead to premature wear and damage. Avoiding these errors is crucial for achieving long-lasting and flawless results.
Applying gel nail polish at home is achievable for beginners with the right tools and techniques. A comprehensive guide simplifies the process, making professional-looking manicures accessible without visiting a salon. At Profile The Chain of Salons, we empower you with the knowledge to master this skill. Learn the essential steps for a perfect gel manicure at home in the following sections.
What are the essential steps for applying gel nail polish correctly?
Applying gel nail polish correctly involves several key stages to ensure a flawless and long-lasting finish. This detailed process includes careful nail preparation, precise base coat application, even color layering, and a protective top coat. Each step requires specific techniques for optimal results. Understanding these essential steps guides the application, transitioning into more detailed discussions of each stage.
How do you prepare your nails for gel polish application?
Preparing nails for gel polish involves three steps: cleaning, shaping, and buffing. This creates an optimal surface for adhesion and longevity. Careful preparation is crucial for preventing common issues like chipping or lifting. Properly prepared nails ensure a smooth, even application and a durable manicure. The following detailed steps guide the process for optimal gel polish adherence. Prioritizing thorough nail preparation is vital for achieving a professional and long-lasting gel manicure at home.
What is the correct way to apply gel base coat?
Applying gel base coat correctly involves brushing a thin, even layer onto prepped nails, then curing under a UV/LED lamp for proper adhesion. This crucial step prepares the nail surface, creating a strong foundation for subsequent gel polish layers. Proper application prevents common issues like lifting and chipping.
After preparing your nails, apply a very thin, uniform layer of gel base coat from the cuticle to the free edge. Avoid getting the product on your skin or cuticles to prevent lifting. Once applied, cure the base coat under a UV/LED lamp for the duration recommended by the product manufacturer. This curing process seals the base coat, making the nail surface tacky and ready for color application.
How should you apply gel color polish for a flawless finish?

Achieve a flawless gel polish finish by brushing multiple thin coats, avoiding the cuticle, and properly curing each layer. This method ensures an even, durable, and professional-looking manicure. Achieving a smooth and long-lasting gel manicure relies on meticulous application of the color layers. Applying too much product or getting it on the skin leads to lifting and chipping. Apply the first thin layer of gel color polish from the cuticle to the free edge, keeping it away from the skin. Cure this layer under a UV/LED lamp according to the manufacturer’s instructions. Repeat this process with a second thin coat, curing again. For some colors, a third thin coat may be necessary to achieve full opacity and vibrancy, followed by proper curing.
What is the final step in applying gel nail polish?
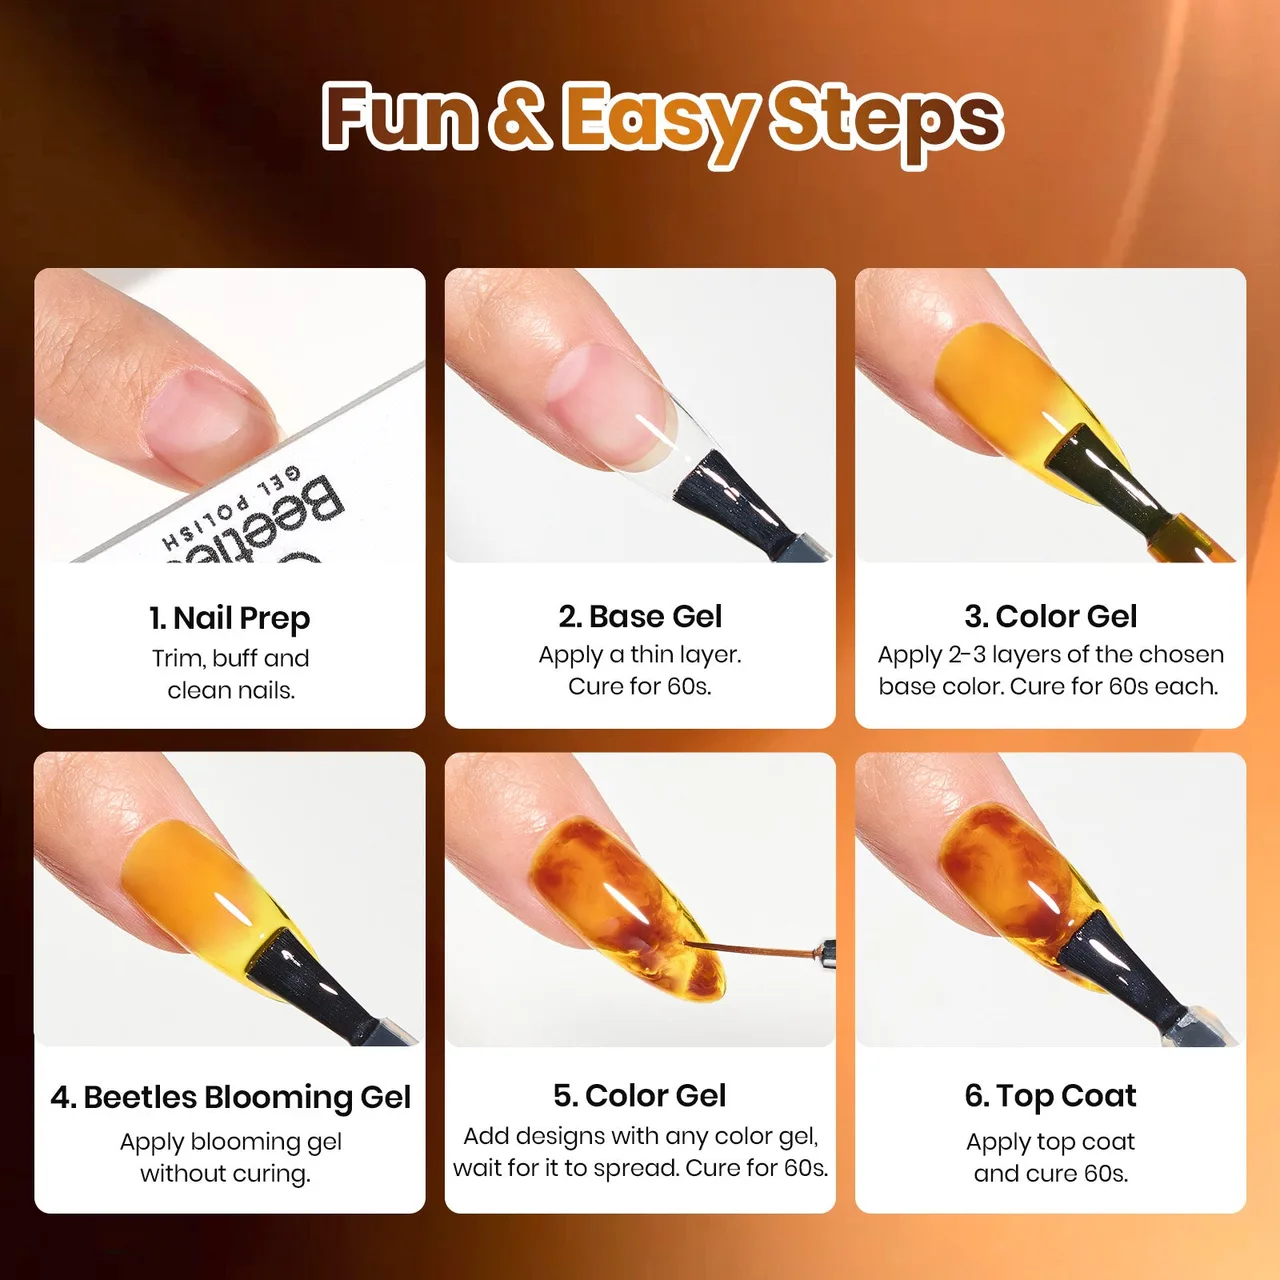
The final step in applying gel nail polish involves applying a top coat, curing it, and wiping the inhibition layer for a glossy finish. This crucial stage seals the color and provides a protective, high-shine layer that extends the life of the manicure. Proper application of the top coat prevents chipping and maintains the polish’s integrity. Apply a thin, even layer of gel top coat over the cured color polish, ensuring full coverage without touching the cuticles. Cure this layer under a UV/LED lamp according to the manufacturer’s instructions. After curing, a sticky inhibition layer often remains; remove this with a lint-free wipe saturated with isopropyl alcohol or a specialized gel cleanser to reveal a smooth, shiny surface.
What are common mistakes to avoid when applying gel nail polish?
Common mistakes during gel nail polish application include improper nail preparation, incorrect base or top coat application, and inadequate curing.
Avoiding these errors ensures a durable, professional-looking manicure. Understanding these issues prevents chipping, lifting, and dullness, contributing to a flawless gel finish.
What are common errors in nail preparation for gel polish?
Common errors in nail preparation include inadequate cleaning, improper cuticle pushing, and over-buffing. These mistakes compromise adhesion and durability, directly impacting the longevity and appearance of a gel manicure. Addressing these issues ensures a better foundation for the gel polish. Neglecting proper nail preparation steps leads to frequent problems such as lifting and chipping. Failing to thoroughly clean the nail plate leaves oils and debris, which prevents the gel from adhering properly. Pushing cuticles incorrectly or too aggressively causes damage to the nail bed and surrounding skin, also leading to poor adhesion. Over-buffing thins the natural nail, making it weaker and more susceptible to damage and improper gel bonding.
What mistakes are often made during gel polish application?

Common errors in gel polish application include thick coats, cuticle flooding, insufficient curing, and not capping the free edge. These mistakes often lead to premature chipping, lifting, and an unprofessional finish. Addressing these issues is essential for achieving a long-lasting and aesthetically pleasing gel manicure.
Many application problems arise from overlooking critical steps or rushing the process. Applying gel polish too thickly results in improper curing, causing the polish to wrinkle or peel quickly. Allowing the gel to flood the cuticles or sidewalls creates pathways for lifting, compromising the manicure’s longevity. Insufficient curing under a UV/LED lamp leaves the gel soft and prone to damage, reducing its durability. Failing to “cap” the free edge of the nail, by running a thin line of gel across it, leaves the tip vulnerable to chipping and wear, as it does not seal the nail adequately.
Can you apply gel nail polish at home effectively?
Applying gel nail polish at home effectively achieves salon-quality results with proper techniques and tools. This allows for professional-looking manicures without frequent salon visits. Meticulous execution of each step, from preparation to curing, ensures durability and a flawless finish. Adhering to best practices prevents common issues and ensures long-lasting wear.
What are the essential tips for beginners applying gel nail polish?
For beginners applying gel nail polish, meticulous preparation, thin coats, and proper curing ensure a successful manicure. These foundational practices address common pitfalls, making the at-home application process straightforward and effective. Mastering these essential tips establishes a strong base for achieving professional-looking gel nails. Prioritizing thorough nail preparation, including cleaning, shaping, and buffing, creates an optimal surface for adhesion, preventing premature lifting or chipping. Apply gel base, color, and top coats in very thin, even layers to ensure proper curing and a smooth finish. Each layer requires adequate curing under a UV/LED lamp according to the manufacturer’s instructions, as insufficient curing leads to a less durable manicure.
What distinguishes professional gel nail application from home application?
Professional gel nail application differs from home application in techniques, product quality, and durability. These key differences impact the overall quality and longevity of the manicure. Understanding these distinctions helps individuals decide between DIY and salon services.
Home application offers convenience and cost savings, while professional services provide expertise and access to advanced tools. These varying approaches affect the finish, wear, and potential for nail health over time.
Conclusion
Mastering gel nail polish application at home is entirely achievable by following a precise step-by-step guide. From meticulous nail preparation and careful base coat application to consistent, thin layers of color and a protective top coat, each stage is crucial for a durable, salon-quality finish. Avoiding common mistakes like inadequate curing or improper prep ensures longevity and prevents issues like chipping or lifting. By understanding and implementing these essential techniques, beginners can confidently create professional-looking gel manicures from the comfort of their home.